Hyper-V create VM with existing .vhdx
 Andrew Mclaughlin
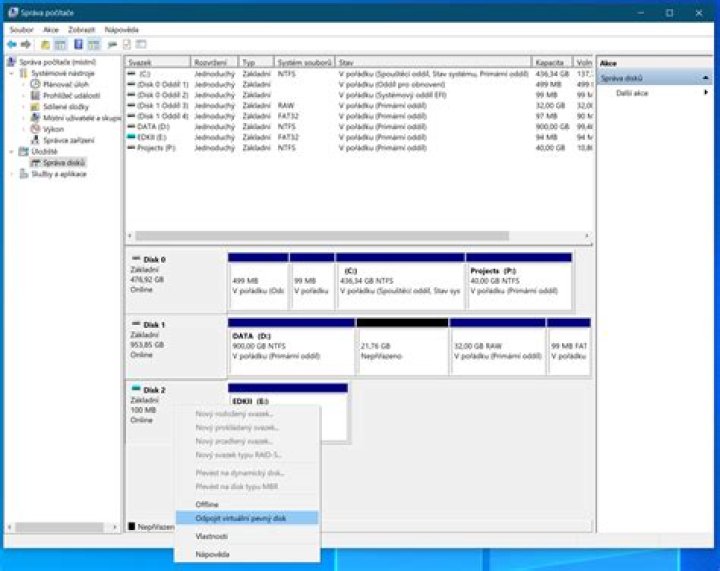
I'm using Hyper-V Manager on Windows 10. I've created a virtual machine and a virtual hard drive, I've installed OS and other software on it. Now I'm trying to use this hard drive for other virtual machines. I've copied it in another location and when creating new virtual machine I pointed this copy as an existing drive. When I started the new virtual machine I got a black screen with PXE Network Boot using IPv4 (ESC to cancel) Performing DHCP Negotiation..... After several minutes I got new black screen with saying DHCP failed and no x64-based UEFI boot loader was found. What I'm missing?
3 Answers
To create a virtual machine off of an existing VHDX, do as follows:
- Create the virtual machine, setting its name, location, RAM assignment, network switches as usual until you get to the "Create a hard drive" screen. Here, select "Attach a hard disk later"
- Next, open the VMs settings and head to iSCSI controller. Add a new Hard Disk here, and point to where your copy of the VHDX is stored
- This is where I believe you are stuck. After adding the hard drive, your boot entries will still be set to NETWORK -> HDD. You need to reverse this. Head to Firmware, and select "Hard Drive". Then hit "Move Up" on the right hand side. Apply the changes, and hit OK.
Your VM should now boot into the OS on the drive
3The trouble in my case was that I'd installed on the .vhdx Ubuntu. It seems that this OS does not create automatically the .efi file if it does not exist (.efi is the file from which the VM boots). So, the solution is:
 1. add DVD drive to the VM 2. specify the same image file from which is loaded the OS on the .vhdx 3. boot in rescue mode 4. after a few quick setups(language, time zone, etc.), you'are asked
for device to use as root file system, then choose **/dev/sda2/**
(I'm not sure why is that :( ) 5. click Yes to mount separate /boot/efi partition 6. from the rescue operation menu, choose
**Force GRUB installation to the EFI removable media path** 7. confirm this choice 8. you are ready to reboot and disconnect the image file :)
main source of this solution:
2When UEFI boots it searches Boot variables stored in NVRAM (it is emulated in Hyper-V) and search for any boot variable. When you create new VM its NVRAM is empty and UEFI does not know what file on the disk can be used as bootloader. You must create boot entry (which is in Hyper-V visualised as File boot option) manually. Hyper-V has no way how to do it from the host but you can do it from the guest itself. You need only know where the bootloader is located. It is something.efi (usualy bootx64.efi) file located somewhere on the EFI System Partition (ESP) which is normal FAT32 partition and contains some files. In Linux this partition is mounted to /boot directory. You can look for it at original machine. For debian for example it is in EFI/debian/shimx64.efi, but you can just try find and try any efi file you find in /boot folder at your original computer with linux.
You need to create small bootable media with UEFI Shell (aka. EDK II) and creates boot entry manually using it. You can do it in the following way.
1) Download latest release of EDK II UEFI SHELL (at write time of this post it is ShellBinPkg.zip) from GitHub
2) Using disk manager create new small VHDX disk (capacity 100MB is sufficient).
3) Initialize that disk.
4) Create new FAT32 partition
5) In the newly create partition (in my case letter is E: as you can see at previous screenshot) create directory EFI and and EFI\boot.
6) From downloaded zip archive copy UefiShell/X64/Shell.efi file to EFI\boot folder and rename it to bootx64.efi
7) detach virtual disk.
8) add virtual disk to your VM.
9) Temporarily disable Secure Boot of your VM.
9) Go to the firmware tab and move edkii.vhdx as first boot option.
10) Start VM. You will see EDK II UEFI SHELL.
11) Enter the following command containing path to bootloader.
bcfg boot add 0 fs0:\EFI\debian\shimx64.efi` NAME_OF_DISTRIBUTION12) reboot using reset command. Now you will successfully boot and in Firmware settings in Hyper-V you will see required File boot option.
13) detach disk with EFI shell and restore SecureBoot settings.
1